Blog

Merging and Deleting Items

One of the fundamentals of QuickBooks is that once you use an account, name, or item you can’t delete it.  It is now attached to a transaction and you can’t remove it because now the transaction that is associated with it has no place to go.  For example if you created several checks from a bank account you cannot then delete that account.  Where would the checks you have written post to?

Luckily QuickBooks has a built in feature that will stop you from deleting items, names and accounts that you have already used.  A pop up window will appear and let you know that that name, item or account were used in a transaction and offer to make it “inactive”.  Inactive means the name, item or account still exist and will show on reports but are no longer available from dropdown lists etc and no longer appear in your QuickBooks file on the lists without asking to show “inactive” items.

If you have found that you have a duplicate name, item or account you can avoid having multiple duplicates without deleting.  QuickBooks will allow you to merge multiple items, names or accounts into one and will combine all of the transactions associated with them when you do it.  This will help you avoid moving what could be hundreds of transactions one by one.  This feature must be used with CAUTION!  Once something is merged, including its hundreds of transactions, it cannot be unmerged.  If you wanted to make them two separate entities again you would have to move each transaction individually.    Merging QuickBooks items, accounts or names is not something that should probably be done while wrangling children or sipping margaritas.  It could make for a tough clean up.

Starting Setting Up or Editing Your Chart of Accounts

QuickBooks needs to be set up properly to work properly.  If you don’t know what an asset or a liability are you will need to learn.  There are dozens of options to learn, but one of the easiest is Kahn Academy.  www.khanacademy.org/ can teach you about assets, cash v. accrual accounting, or how to read a cash flow statement.
Once you have learned what an asset is you then need to figure out what assets you have, and set them up in your chart of accounts.

Exporting Quickbooks Reports to Excel

QuickBooks offers an export function within most report windows.  It can be found in the same tool bar as the modify button.   The export button will open the report you are viewing in a new excel window or you can choose to add a worksheet to an existing excel workbook.  In order to add it to an excel workbook you already have save the workbook must be closed.  Read More

Paperless Accounting with QuickBooks

“Paperless Accounting” it is a phrase that will strike fear into the heart of many a bookkeeper or auditor.  With today’s improved technology, affordable hardware, and cloud file storage solutions many of the drawbacks paperless accounting are now worries of a bygone era.  Please don’t mistake me as saying “throw all the paper away” because I am absolutely not.  However, if you are interested in reducing the paper in your office and streamlining document sharing within a work environment there are plenty of options out there.  Two of the more popular products are what we are comparing.

With QuickBooks Pro and higher versions, 2010 and newer,  offer an attach option within the program. This allows you to scan a document and “attach” it to your transaction in QuickBooks.  This function is fairly user friendly, but charges a monthly fee.  The fees from Intuit vary from the try it for free version for up to 100MB, to $29.95 per month per user for 5GBs.  At the end of a trial period if you decide not to continue with the program your data will no longer be available to you.  Meaning all attached documents are lost.  With no local save option you are now making a lifelong contract because some documents need to be saved that long and possibly even longer.  This is stated in paragraph four of the user agreement but who ever reads those?  Your data may then be stored in multiple countries and your data is not encrypted.   If your business has documents with personal and sensitive information along with government i.d. numbers and financial institution account numbers storing data like that unsecured would be a violation of state and federal law in many places so you must use caution with what you choose to store.  The QuickBooks Attach Document option  is an acceptable one for the occasional customer complaint letter you want to add to their file, but other than that it is not a “paperless office” solution.

One of the other products out there on the market is Smart Vault.  Smart Vault “provides an intuitive, Web-based solution for users to store, view and share files securely any time and from anywhere”,  and also allows you to attach documents in QuickBooks.  Their data transfer and storage is secure and encrypted.  The data storage prices are reasonable.  At $39.00 per month for 3 users it is actually cheaper than QuickBooks’ offerings.  The icing on the cake is that Smart Vault offers the ability to share data with other authorized people and, at the professional level package, it allows you to monitor access. 

While I dream of vanishing stacks of paper it may not be a total reality yet.  Products like Smart Vault are making it more likely though.

Quickbooks Custom Designs for Your Templates

How many times have you seen the same QuickBooks standard template over and over in invoices you receive.  Are you guilty of sending those standard balck and white off center small font invoices?  Getting a custom design look is even easier than you think.

In the templates window in your own Quickbooks file you can click in the “TEMPLATES” button in the lower left hand corner.  In the list that appears will be an option to “CREATE FORM DESIGN”.  Once you click on this button you will be guided through a multitude of optons far above and beyond those offered in the simple templates options.

Creating your own custom look can take less than 20 minutes!

Top 10 Reasons to go to Geek Girl Boot Camp…

Here are the Top 10 Reasons to go to Geek Girl Boot Camp on Saturday, March 19th from 8 am. to 6 p.m. at the Cape Cod Community College in West Barnstable:

10.) Not a Geek? Not a problem. It’s meant for all types of computer users; newbies, the hesitant, the self-taught, hard-core geeks, and people just wanting to empower themselves with all things geeky. Knowledge is Good!

9.) Not a Girl? Not a problem. The demographics of Boot Camp range from our youngest at 10 to our oldest at 84. And guys are totally welcome!

8.) Open schedule. Go to any workshop you want (some may have max capacity, etc)

7.) Come with friend/fellow co-worker and divide and conquer on workshops and share. Make new friends. Then learn how to make friends online with Facebook and Twitter!

6.) Outstanding Value. 8 hours of computer instruction, demos, discussion and the famous Geek Girl Help Desk, for less than the cost of 1 hour with a computer tech. Bring a laptop and take advantage of the opportunity!

5.) It’s Local! Right in your own backyard! No need to travel to Boston or Silicon Valley to get the latest on technology. It’s so simple!

4.) You’ll have fun! End the day with a schwag bag full of goodies and a tshirt, mix and mingle with attendees and speakers at the cocktail party where oodles of giveaways will be handed out to winners. (And martinis.)

3.) The Essential Geek Girl Handbook. Containing Top Ten Lists for workshops, speaker bios, ads from sponsors, glossaries, resources and filled with your own notes, this full-color book will be your reference source long after Boot Camp is over.

2.) Demos. Check out computers, smart phones, tablets, video cameras, digital cameras and other consumer products before buying. Get information from the people who use the products every day.

And the #1 Reason to go to Geek Girl Camp….

1.) Just so you can shock your know-it-all teenagers, your impatient spouse or that know-it-all guy in your office and say, “No thanks, I don’t need you to fix my computer. I went to Geek Girl Camp and I can do it myself!” Priceless…

It’s not too late! Register NOW!

Just a Thought: Donate a Scholarship to a Student or Woman in Need! This is a wonderful way to “Pay it Forward” – You can stay anonymous or we can post your name on the website. Contact us for more information.

See you at Boot Camp!

The Geek Girls

Using QuickBooks To Make A Workers' Comp Audit Easy

The better prepared you are for your workers’ comp audit the easier they are.  Using two simple fields in your QuickBooks can make preparing for your audit a 5 minute project not a two day ordeal.

If you open up your vendor details and select the additional info tab you will see some fields that can be used to help you track important non-financial information about your vendors.  On the left side of the window is a drop down list called “type” This list can be customized for your business.  Creating an item called “Subcontractor” will allow you to pull a quick report that shows all vendors who provide subcontractor services.  This “subcontractor” vendor type can then be selected each time you add a new subcontractor to your vendor list.

To the right you will see an area called “custom fields”.  This area can be customized for your business needs.  Once custom fields are created they will appear in the custom fields area for all vendors.  When dealing with subcontractors it would be suggested to create three custom fields for your vendors.

1. Liability Expiration Date

2. Workers’ Compensation Expiration Date

3. Insurance Agent

These fields are not exportable, but can be printed and searched.

At the time of audit a report will need to be printed.  To print that report:

  1. Go to “Lists” / Vendor Profile List/ Vendor Type List
  2. You can then select the vendor type “subcontractor”
  3. At the bottom of the page you click the report button and quick report.
  4. That report can then be modified to your audit date range by clicking on the modify report button.
  5. While in the modify report section you should check the workers’ compensation expiration option from the columns drop down list.

The final report will show all subcontractors paid during your audit period, their workers compensation dates and your auditor can either work from this list for a random sampling in an in person audit or it can be printed and included in a mail in audit.  Certificates should always be filed in paper or electronic form in such a way it will allow you access across fiscal years in order to provide them to the audit company if required.

Backing Up Your QuickBooks: Basic But So Important

How many times have you heard the horror stories about people who lose a hard drive and spend months digging out?  We hear it at least once a month.  We have people every year that walk through our door and tell us they or their bookkeeper never backed up and they lost the file.  People never seem to learn.  An ounce of prevention beats a pound of cure every time.  Here are a few tips to help you avoid the dreaded loss of your QuickBooks file.

1. Consider hosting your file in “The Cloud”. Sounds really fancy huh? It isn’t really.  Services like Right Networks provide great services where you log onto a virtual desktop via an icon on your desktop or the net.  The remote desktop connection is safe and dependable.  When your files are hosted by Right Networks they are constantly backed up and stored off site for you.  Be sure to choose a server set up that is secure, backs up regularly and provides good support or;

2. Back up regularly and store your back up files on a service like Carbonite.  Inexpensive especially when you compare it to the cost of file reconstruction or;

3. Back up on an encrypted external hard drive and store it offsite.

Do not pay to use Intuit’s Online backup service.  There are lots more easier to use less expensive options out there.

To Create a QuickBooks backup file:

1. Click on the file drop down menu.

2. Select “Save Copy or Backup”

3. Select “Backup Copy” and Next

4. Select Local Backup and Next

5. Select “Save it now and schedule future backups”

6. Check the box for “Save backup copy automatically when I close company” and set the number of times so you are saving every week or so and click Finish.

If you are using an offsite service like Carbonite or an external hard drive you should then move the backup copy to that location.

Backing up your QuickBooks file also cleans up the data on the back end preventing data corruption and loss.

Meghan Blair-Valero

www.foggedinbookkeeping.com

Time Tracker In QuickBooks

Keeping track of your time and your employees’ time spent on the job is not only necessary to make money it is also required by law if you are an employer.  I can’t tell you how many times I have run into employers who didn’t keep time records and ended up paying tons in fines and penalties due to a disgruntled employee’s complaint to Department of Labor.  As a QuickBooks user you have several options.

If you are a small business with less than three employees who spend large chunks of time on few projects or your employees time is not billable the QuickBooks timesheet will work for you.  Easy to fill in and print for your records a simple program built right into your software at no extra cost will fit your needs.

If you have more employees or have employees who all work in small increments on projects whose time need to be tracked in detail than the timesheet in QuickBooks will be too time consuming and impractical.  Your employees may also work off site.  You need a more versatile app or piece of software.  Minute 7 offers a great product with a mobile app and a web based interface.  This program syncs easily with your QuickBooks program continuously while your computer is on via the Webconnect software built into QuickBooks.  A reasonable price and 30 day free trial make this a great choice for an employer with a computer user or iPhone using labor force.

If your employees don’t use computers for the job, maybe they are construction labor or work in a more industrial application, there are several digital punch clocks available.  These clocks will download time into QuickBooks reasonably cleanly.  No monthly fee and fairly easy set up make them a great choice for those that need their time entered in QuickBooks but don’t want to hand enter.  Intuit Community Marketplace offers several great options.

Printing 1099s and 1096s From QuickBooks For 2010 Business Activity

Printing 1099s and 1096s From QuickBooks For 2010 Business Activity

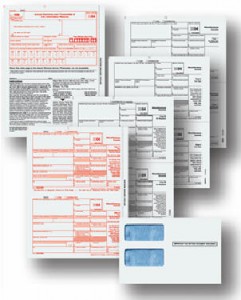
Preparing 1099’s can be as simple as 1-2-3.  QuickBooks has a built-in 1099 function.  The function can be found in the vendor drop down menu.  When you select the “Print 1099/1096” function a window will open and show four steps.  These four steps will guide you through the majority of what is needed to be done to complete your 1099’s.  It does not cover two important steps however.

  1. Order laser printable 1099 and 1096 forms.  Order enough for your 1099’s and a few extras.
  2. Reconcile the cash and credit card accounts.  This will assure that you are reporting the correct totals.  Transactions that are older and uncleared should be voided or written off to correct payment totals.

Following the QuickBooks steps 1 to 4 in the 1099/1096 window will then walk you through the rest of your process.  It is always important to remember that if you are unclear on the qualifications of who is eligible for a 1099 in step one to consult with an accountant or certified tax preparer.

In step two it is almost always necessary to list several accounts for box 7.  In 2007 and older versions of QuickBooks multiple accounts are not allowed so you must plan accordingly.  New versions allow you to select multiple accounts to be included in the information for the 1099 total. This can be important if you pay a service vendor for several things some of which are eligible for 1099 reporting, and some of which are not.  An example of this would be if you pay a service provider such as a 1099 eligible graphic designer $1200 for design services and for printed business cards.  The design service would be eligible for 1099 reporting and the business cards will not.  By posting the service portion of the payment to an account for professional services and posting the business cards to printing and reproduction you can then 1099 the designer for just their services.

When you review the preliminary report amounts in the first columns will appear the totals that will print on the 1099 form. Amounts to the far right are amounts that were paid to a 1099 eligible vendor, but were not included in a 1099 eligible account.  Those totals on the far right will not appear on the form.

It is best if you print preview the 1099 forms to double check that all information is there and accurate.  Vendors’ addresses, TIN or Social Security numbers, your company TIN or Social Security number, your completed address and contact information should all be present.  Hand written 1099 forms and 1099 forms that are not printed on the scan able preprinted forms will not be accepted by the IRS.

If you are required to file electronically due to the number of 1099’s that you file you will not be able to use the QuickBooks “Print 1099” function.